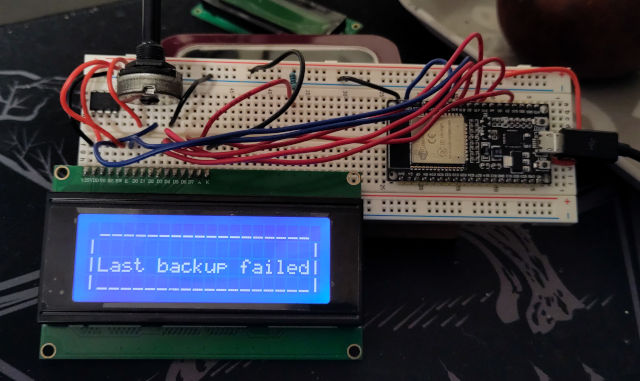
ESP32-LCD
A status LCD for your homelab.
BOM
- Any HD44780-based character LCD display, up to 20x4 characters. The most common are 16x2 characters (16 characters per row, 2 rows).
- An ESP-32 board
- A potentiometer, usually a 10 or 100k one, for controlling contrast (a couple of resistances arranged as a voltage divider may also be fine)
Assembly
Connect the LCD to the board:
LCD Pin ESP32 Pin
PIN01-VSS GND PIN02-VDD 5V PIN03 V0 10K Pot (Middle pin) PIN04 RS GPIO19 PIN05 RW GND PIN06 E GPIO23 PIN07 D0 NOT USED PIN08 D1 NOT USED PIN09 D2 NOT USED PIN10 D3 NOT USED PIN11 D4 GPIO18 PIN12 D5 GPIO17 PIN13 D6 GPIO16 PIN14 D7 GPIO15 PIN15 A 5V PIN16 K GND
Open config.h file and set display size and your wifi data.
Flash the code to the ESP32. If you use the Arduino ide to do it, just open the esp32-lcd.ino file with the Arduino ide and follow this instructions
Restart the ESP32. The display shows "Conn to wifi..." with the WIFI name in the second line (if using a two or more lines display) and then will show the IP address.
Use
- Turn on the circuit, wait for connection and note down the IP address shown on the screen.
- Make a GET request to the same IP address with a parameter "message" containing some text
Example: to make the request using CURL from command line, try something along this lines (replace the IP addr with the one shown in the display): curl -G http://192.168.1.78 --data-urlencode "message=Something interesting happened!"
Troubleshooting
The ESP32 logs are written in the serial monitor at 115200 baud. Just open the Arduino ide Serial Monitor from Tools menu and look at the logs.
